Building A Structure In Depth
Required:
Items & Blocks.
Optional:
Expressions & Generation Logic.
Loot Generation.
The first step to creating proper structures is planning. You need to know how big you plan on making your structure, and what shape it will take. Since a structure needs to have an arbitrary size in which everything must fit, you should do some outlining to get a rough idea and then mark the bounds of the structure you want to build.
Keep in mind that whatever the bounds of the actual building itself, you will have several additional blocks stretching in each direction to account for terrain smoothing. To keep everything clean, it is often better to build your structure in a super flat world floating above the ground. Make sure you raise it enough to account for the planned ground blocks that will be underneath it.
It is beneficial to keep such build worlds and label each structure, so that you always have a backup.
The easiest structure shapes to build are cuboid, but this isn't always the most interesting. A structure's shape, however, is limited to a rectangular prism of any shape, which means that longer structures will have a harder time generating due to spreading across larger areas of terrain (which might not always fit). There is also the consideration of performance, where larger structures stretch across more chunks. Where possible, it is best to make structures taller rather than wider, and to avoid shapes which are too long (so you can get away with larger vertical structures than comparable horizontally distributed structures).
Should you wish to have irregular shapes other than rectangular prisms, this is possible with structure script blocks, though it does have certain limitations.
The last thing to consider is performance with block count. The larger a structure is, the more resource intensive it will be to generate, with extremely large ones causing temporary world freezes. What the threshold is will highly depend on the Modpack's number and type of worldgen related mods, and the computer's CPU. But as a rough reference, a medium sized modpack with few worldgen mods on an Intel i5-9600K (running 4.2Ghz) would freeze for 5-8 seconds when generating a structure of 186k blocks, and about 3 seconds for one with 88k blocks. You can do some quick math by multiplying the planned bounds of your structure (width, height, & length) to find the block count. Not catastrophic, but you definitely don't want structures of this size to be common, especially on a server. Pre generating will help with this.
Note: A side effect of how structure gen works; block updates aren't triggered, which means blocks with Redstone activation states such as levers, redstone blocks, and redstone torches, will not send signals even when "on" until updated. If you have redstone in your structure, they will need to be player activated.
Getting structures to generate seamlessly with the terrain is one of the best aesthetic additions you can make, and significantly improves the quality of your structures. This can be achieved using the various transformer blocks as well as properly shaped foundations. To make a structure look natural, you'll want to avoid right angles and sharp transitions. Whatever foundation you created for your structure, you'll want to remove the corners to create a roughly circular shape, and then gradually expand and then retract it with several layers downward to form a short of squished sphere/ blob of blocks beneath it. Such foundation shapes create the smoothest integration with surrounding terrain. You'll also want to fill in any air blocks on the outside of the building with negative space blocks to prevent air blocks carving out weird cuboid shapes in the surrounding terrain trees when it generates.
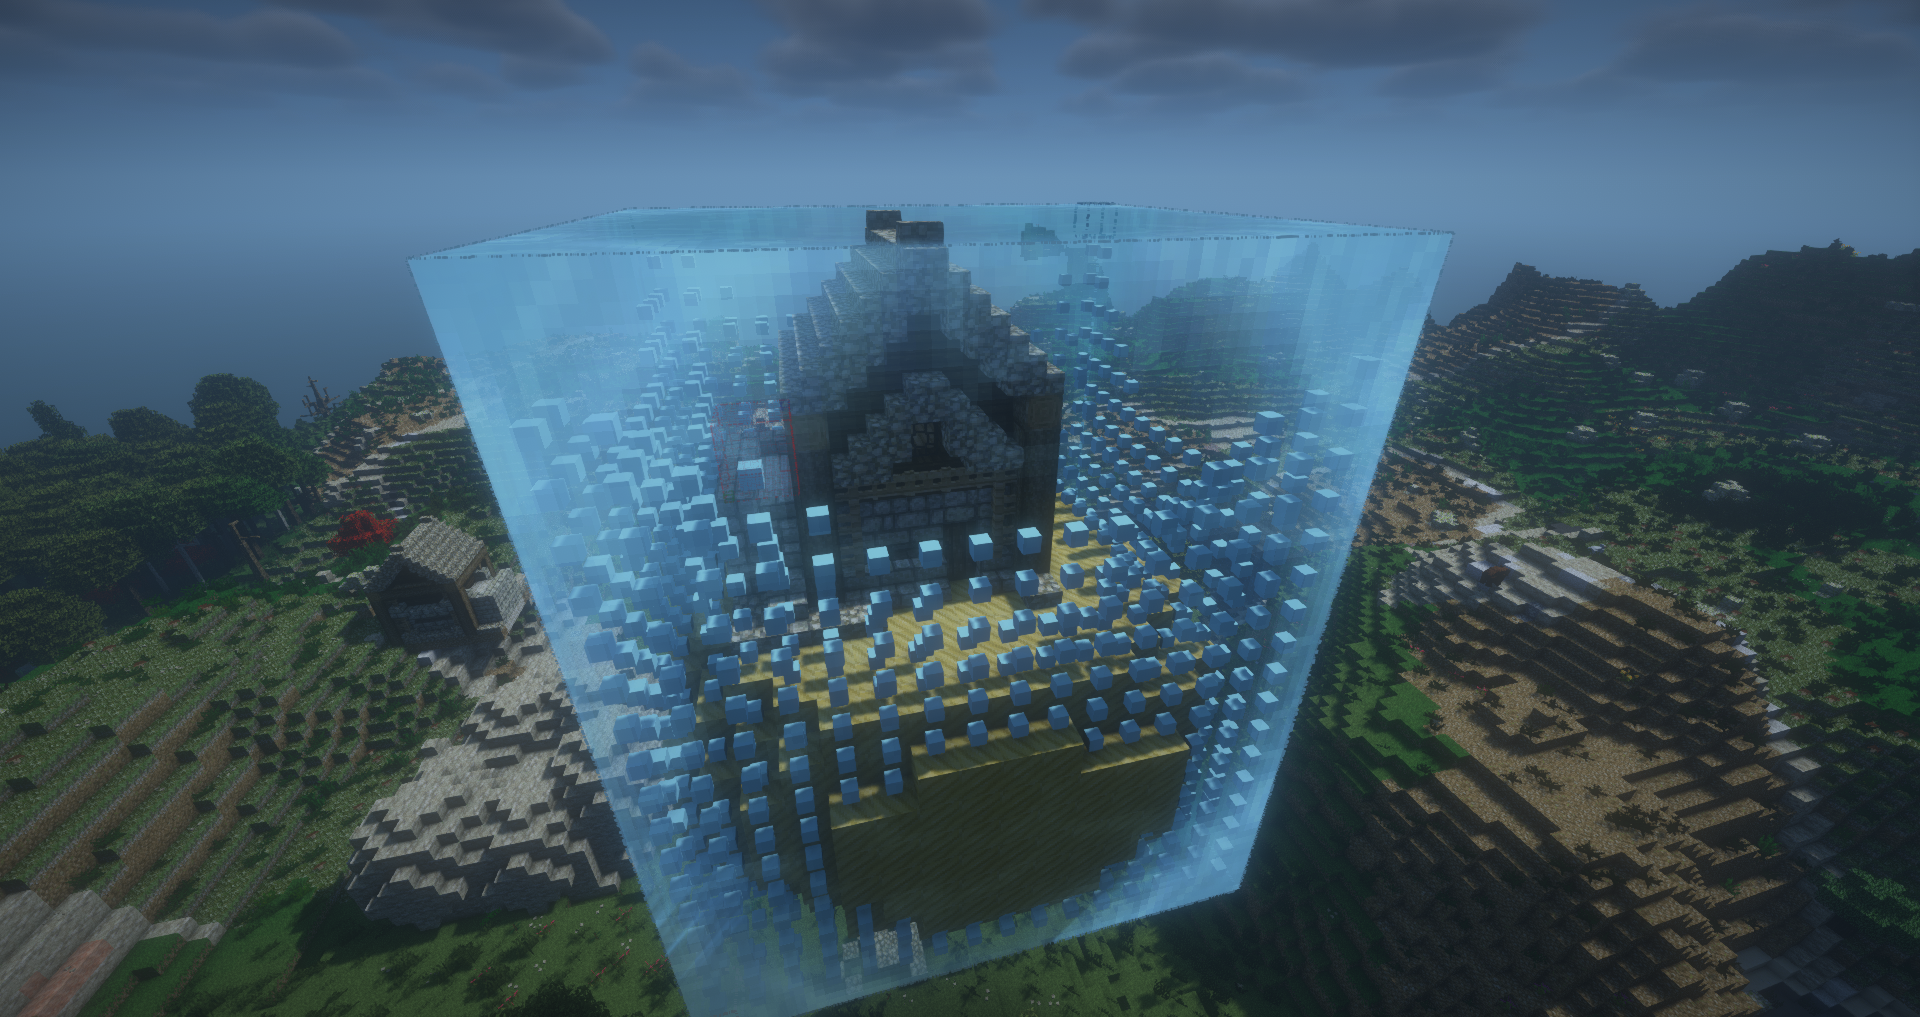
Filling a selected structure space with negative space automatically can be done with the /#natural space command. If you don't want things like trees and nearby terrain getting too close to your structure, you can remove the negative space blocks closest to it to create an air buffer. Tapering these outwards gives a more natural look and prevents sharp angles. Instead of using actual vanilla air blocks, you can even fill in this space with natural air blocks and use transformers to apply fancy rules (such as creating an air buffer around your structure by replacing terrain except if that terrain is trees, to allow them to generate more closely for an overgrown feel). This is covered in more detail in Terrain Blending.
On smaller structures, a simpler foundation of natural ground blocks also works.
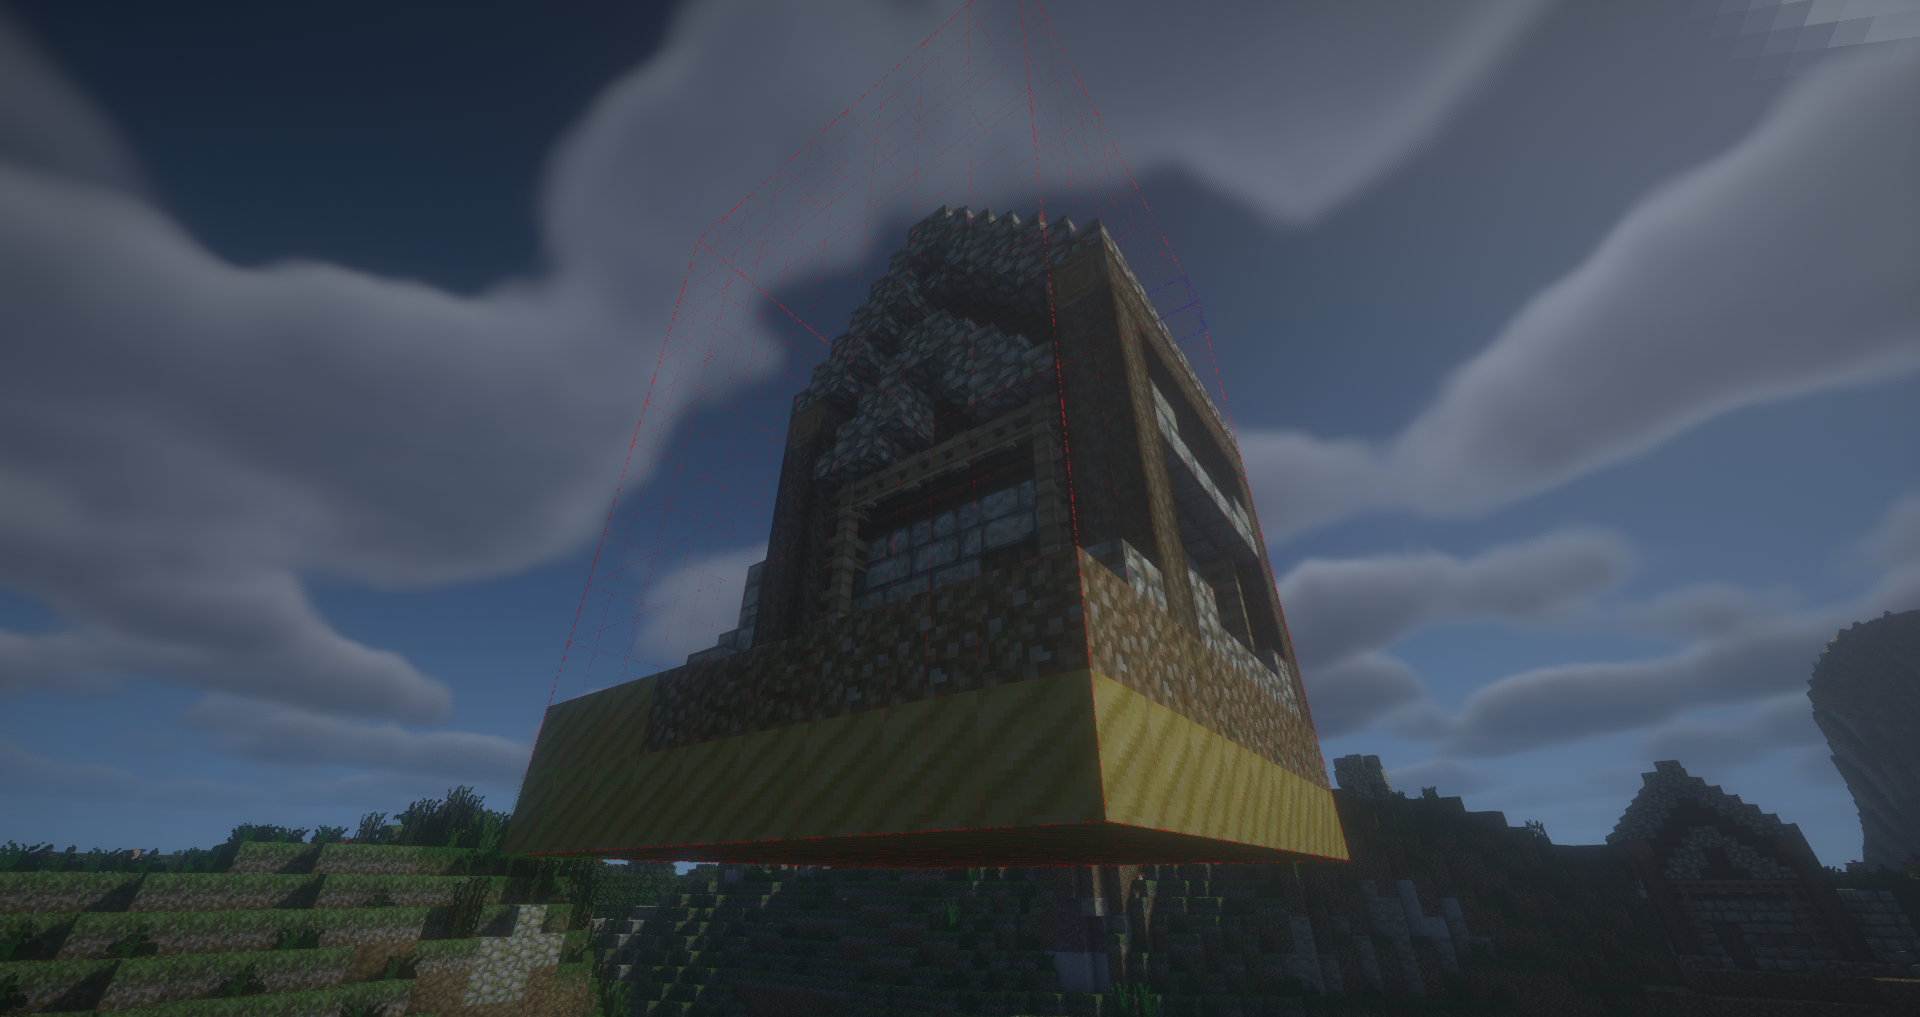
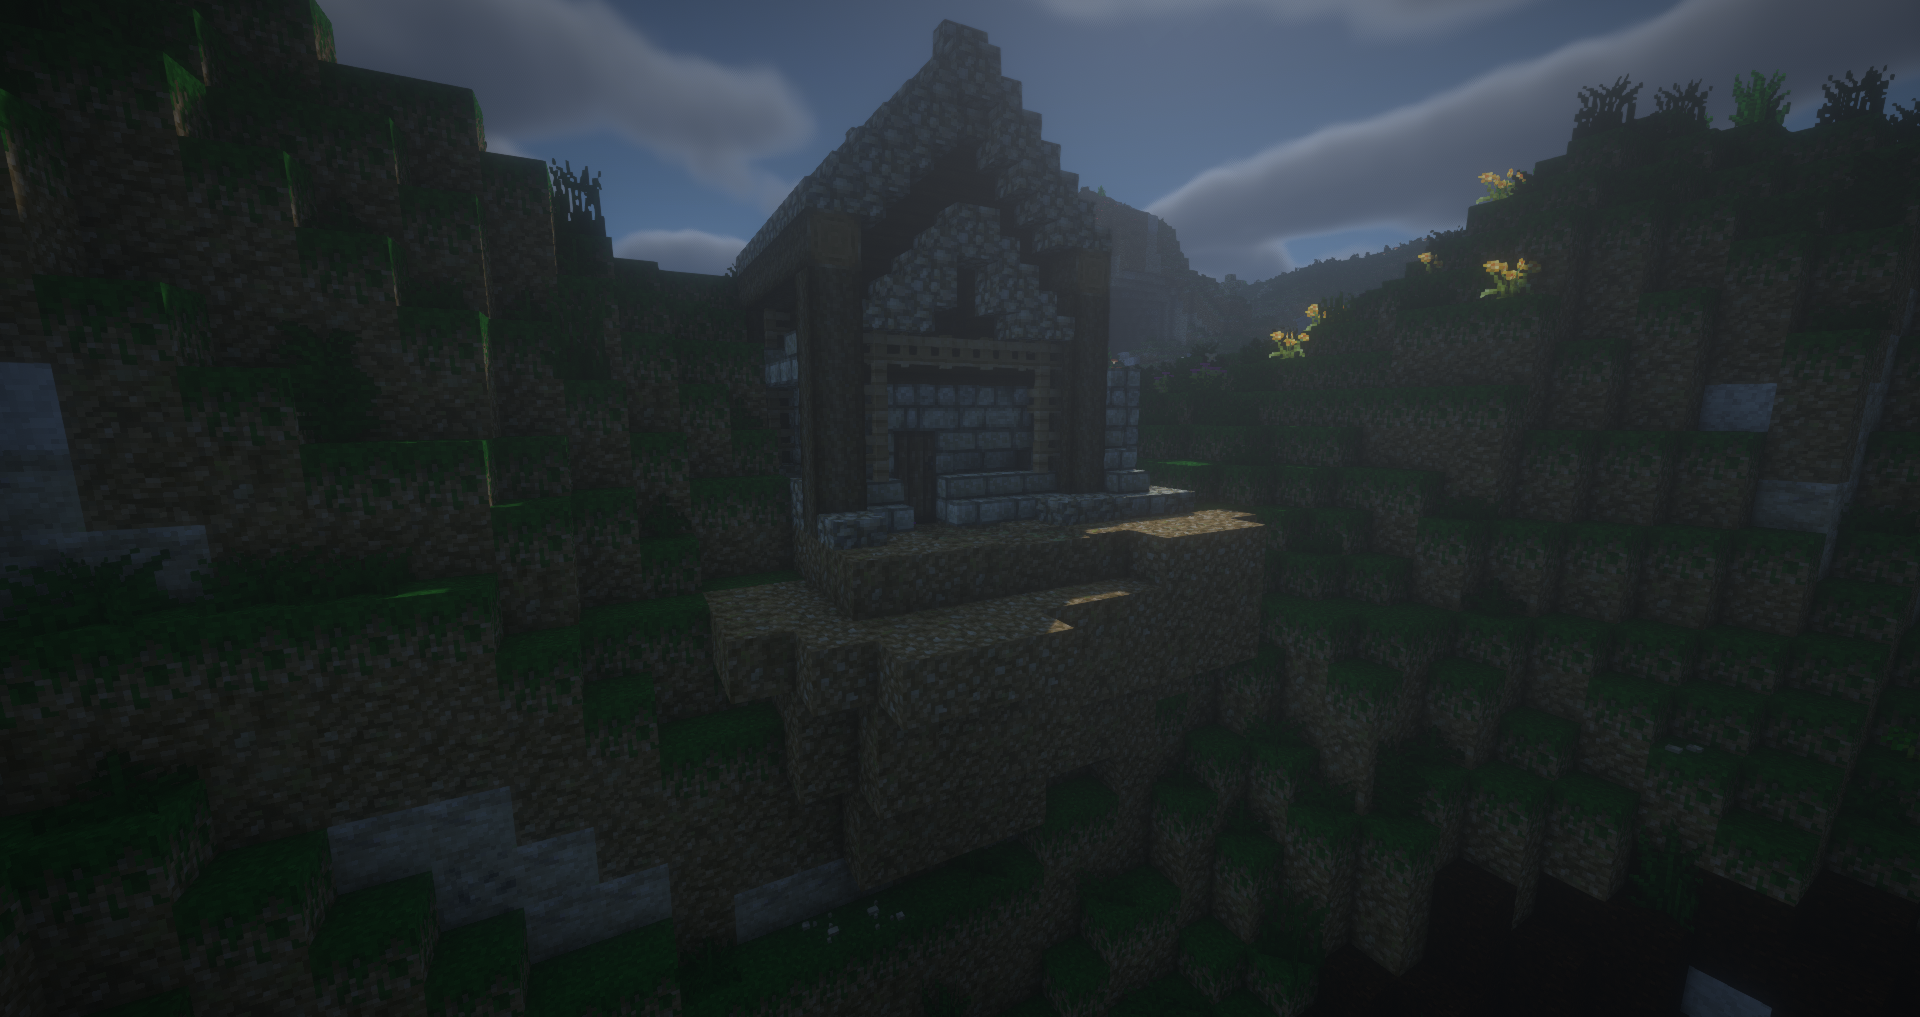
This can be automated with the /#natural floor command, which will place natural ground on the underside of your structure. /#natural smart is also an alternative for both situations, as it will intelligently attempt to fill both negative space and natural ground (it usually succeeds, but be warned that sometimes it incorrectly places the natural ground. I personally prefer to manually fill in natural ground and then use the space fill command instead, or the floor and space commands separately).
Once all the blocks are set up, you can export the structure and configure your generation settings. To save time, it's beneficial to create dummy structures that you save to the "inactive" folder to create generation rule templates. By setting up rules you often use ahead of time, you can export using your dummy structure's name (e.g /#export commonSurfaceTemplate), and then save it under a different name to create a new structure file. Your "template" will remain untouched.
Note that when exporting, any mobs/ entities inside your structure will get exported with it. while useful, this may not always be intentional, so you can set your world to peaceful to ensure all hostile mobs are removed.
Frequency Categories are used to enforce spacing between structures and determines the frequency at which they generate (this is different from weight. Weight simply decides which structure generates when valid, while frequency dictates how often they generate). These values are measured in chunks.
More rare structures should be assigned to rarer frequencies so you don't have good loot structures everywhere. It's also a good idea to assign larger structures to these so they generate less often. In addition to the spacing enforced on all structures in a frequency category, each category also has a "minimum structure instance separation distance." What this means is that if a given structure, let's say SunkenTower, has just generated; that structure will be prevented from generating again until the selection distance is reached to ensure identical structures don't appear frequently next to each other. So if you don't have enough structures in a generation category (such as when disabling the default RC ones), structures from that category will actually generate even less often because RC will run out of unique structures to generate before the minimum separation distance for the last few generated structures has been fulfilled.
You can use the /#write natural_generation_category <type> command to print a frequency category Json to view these values. It also possible to create your own frequency categories or edit existing ones by using these files. See Custom Frequency Categories for more.
The placer is used to determine how exactly your structure generates. For structures using fancier foundations, using the baseline is a must. You'll want to make this value equal to the number of blocks underneath the building/ that are meant to be buried upon generation (such as terrain or basements, or structures that should always generate half buried. Remember that positive values bury the structure and negative values raise it). You can use the expression box below "Baseline" to determine which blocks the baseline is evaluated on. By default it ignores air/ empty space.
When it comes to determining your placer rules, there are several presets you can base off of for common generation types to save time. Should you wish to make your own, set your preset to "clear" and then start adding your own rules. There are two rule categories, "Limit" and "Match."
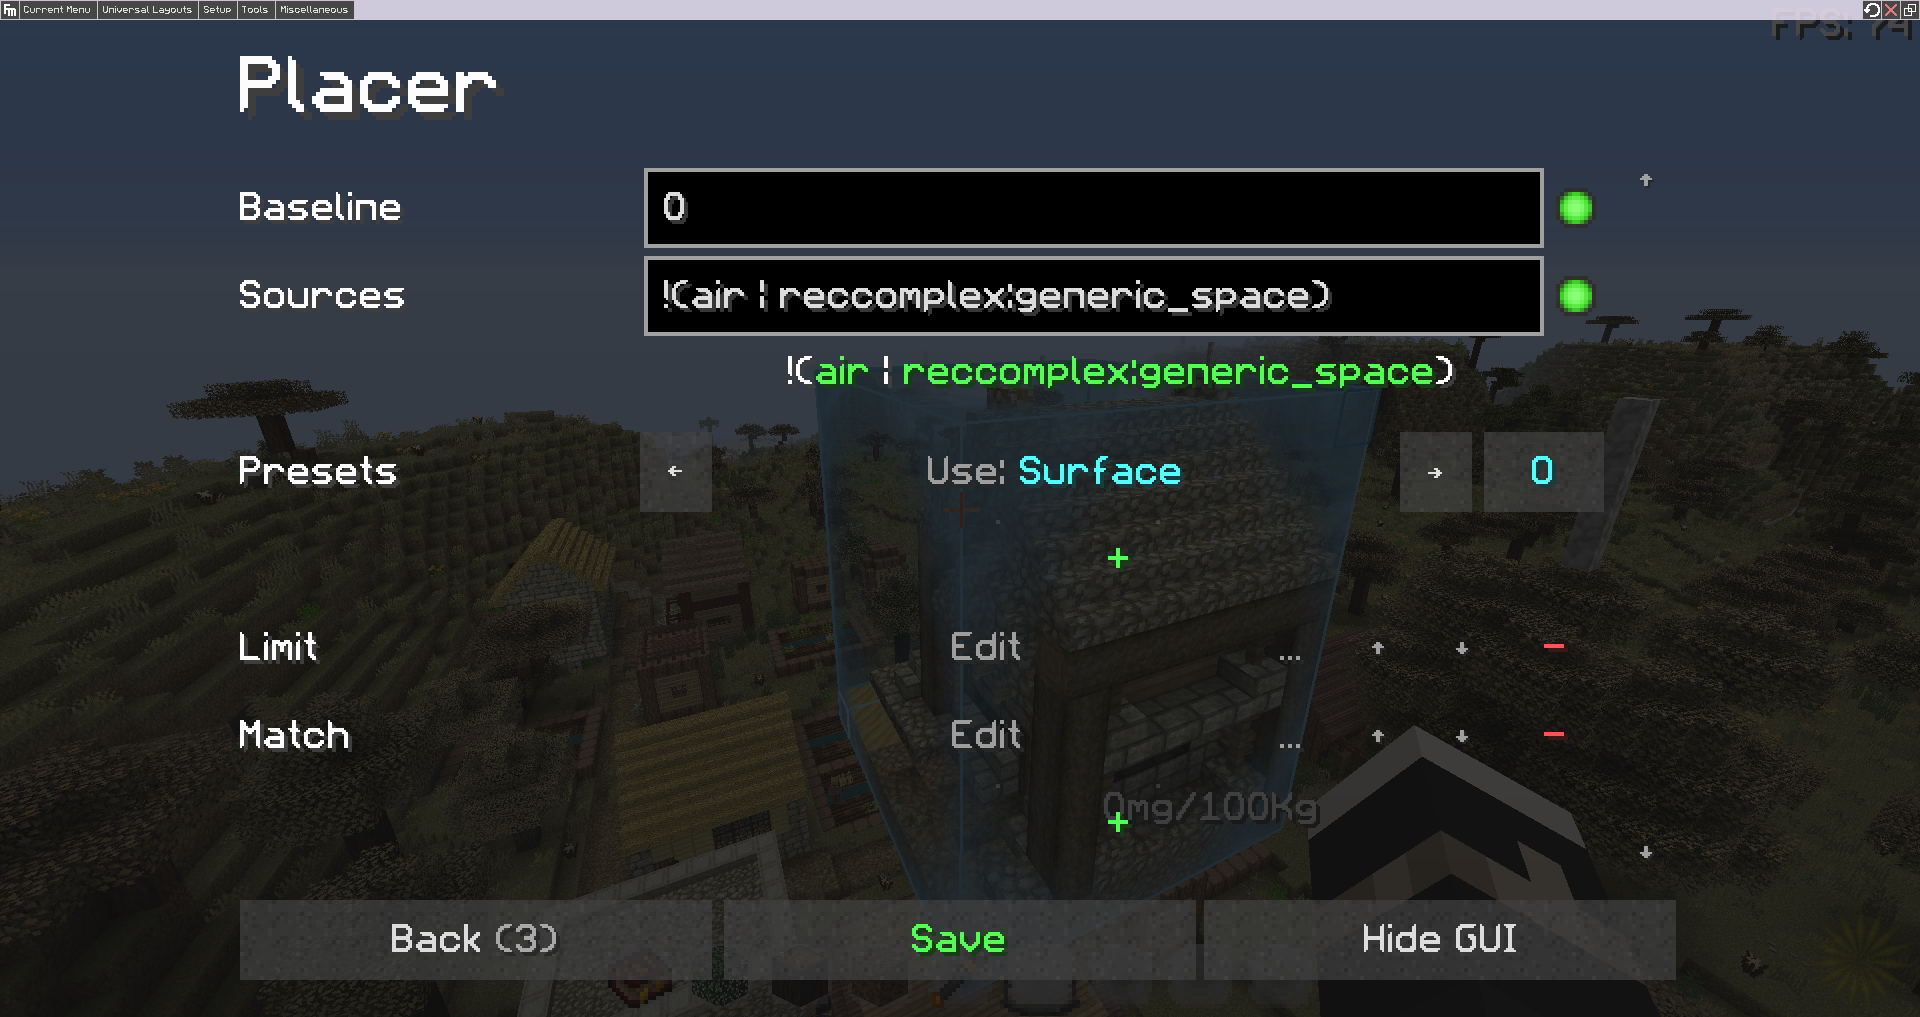
Limit is essentially how your structure is placed, and Match is the restrictions for placing it. If the Match rules aren't matched, then the structure is prevented from generating. If you tend to use a custom set of rules often, you can also save it afterwards by selecting the "+" button that takes the place of the blue "O" you use to edit the placer.
The Matcher takes a positioned block expression (Ensure) and a block expression (Sources). E.g the default surface placer preset's Ensure of !is:liquid and Sources of !air will prevent the structure from generating on water or floating in the air.
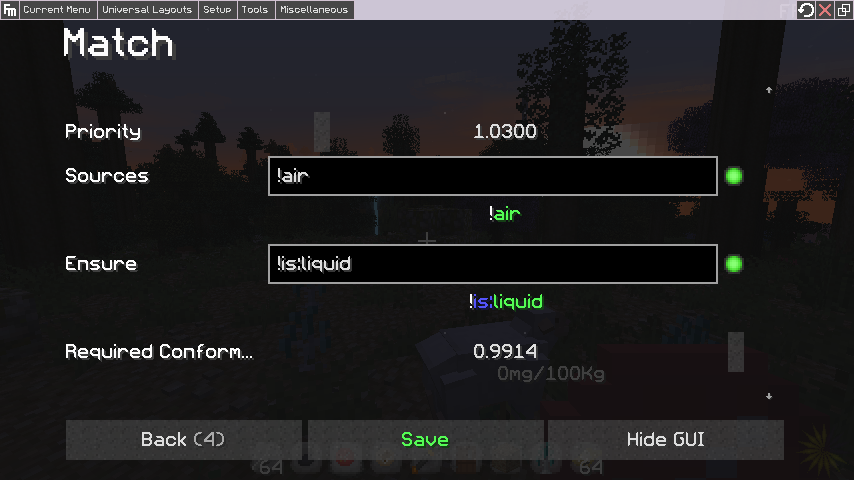
You can also have multiple Matchers for the same structure, which is where the Priority slider comes in. Higher priorities will give more weight to a given matcher set. This is used in conjunction with the Conformity slider in deciding if a given matcher is used. Higher Conformity values will force the terrain to more perfectly match the generation rules for the spawn point to be valid. E.g a Conformity of 1.00 on a matcher that prevents generation over water would block it if any water is detected at all. A conformity of 0.5 would allow partial generation over water. When a location's conformity is lower than the structure's required conformity, other Matchers may be chosen. However, if the priority is higher for this theoretical Matcher, then it will be chosen anyway even if the conformity value is lower than the other Matchers present (citation needed).
Limit decides how the structure is positioned in the world. A sort of "commands" is used in Limit, and are evaluated top to bottom, so the order does matter.
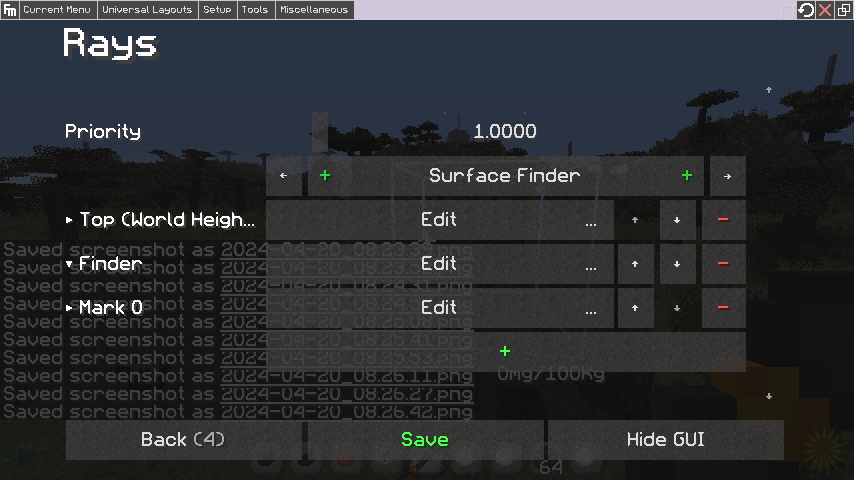
Each command is essentially a calculation that moves a number of blocks, and each can have an "acceptance rate." This determines if the distance moved is a valid generation point or not. Values over 1.0 are considered valid (< 1.0 are semi valid/ sporadic), and values of 0.0 are used when positioning the placer. For example, using a move command with an acceptance of 1.0 would designate that Y range as valid generation points (higher values would give priorities to a given range if using multiple acceptable ranges). The different command types are:
- Dynamic Move: Used to move up or down an amount based on the structure's height. Used for fine tuning, e.g ensuring a structure doesn't generate too close to the world height limit (moving the placer to world height, then dynamic move down), or generates just below the surface (surface finder, and then dynamic move down).
- Dynamic Position: Used to find world positions such as world height or bedrock. These are always used at the beginning of a Limit sequence to set an initial position to move from.
- Finder: This moves the placer based on an expression set. E.g after moving to world height you could move downwards until you find a solid block that isn't sand, allowing you to place your structure on the surface in normal biomes or half buried in desert biomes. You could also use it to place structures on cave ceilings by dynamic positioning at bedrock and moving up until it detects air, and then another rule to move up until it detects solid blocks. There is also a Surface Finder command that is a Finder which prefills the necessary expressions for a generic surface finder.
- Move: Moves the placer a set number of blocks (use negative numbers to move down). Used in conjunction with positional commands to, for example, generate floating structures. Can also be used to mark single positions instead of ranges as valid spawn points if the move is set to 0 and given valid acceptance. Note how the name of the command changes from "move" to "mark" when using valid acceptance values in any of the move commands (name doesn't change for finders).
Set the placer rules to:
- Dynamic position: Top.
- Finder (direction: Down):
(blocks:movement & (!is:foliage | !block.id=minecraft:sand)) | is:liquid. - Mark: 0.
Evaluates as "move to max world height then keep moving down as long as the placer doesn't encounter a solid block which can stop its movement which isn't leaves (don't want to generate on top of trees) or sand (causes the structure to be buried in sandy areas), or if the placer encounters liquid (stops moving the placer and, if water is excluded in the Matcher with!is:liquidor!block.id=water, the don't generate)."
Set the placer rules to:
- Dynamic position: Top.
- Dynamic move: Down.
- Mark: -100.
Evaluates as "move to world height, move down as much as the structure is tall (prevents generating too close to height limit), and mark every block for 100 blocks as a valid generation point.
(To actually get a floating structure to generate, additional setup is required in changing the Matcher to look for air instead of excluding it. See here for an example).
(This example allows the structure to generate only on top of a specific mountain biome in the modpack, or on flat plains-like/ forest biomes near Y64. It uses a theoretical mountain biome which generates with an average height of 100-130. This prevents the structure from generating on cliff sides and whatnot, restricting it to these two location types depending on which is available).
- Dynamic position: Top.
- Move: -126.
- Mark: -30.
- Surface finder: Default.
- Mark: 0.
Evaluates as "move to world height, move down (to the average surface height of our mountain tops) and mark 30 blocks as valid generation, then find the surface and mark it as a valid point. If used in conjunction with a biome limit of plains, forests, and our theoretical mountain biome, the structure would only generate in flat low lying biomes or specifically on the mountain top. You could also just use the first half to specifically restrict the structure to that mountain top, for something like a watch tower outpost.
Note that multiple Limits can be used just like with Matchers, to do things like having a surface generator and underground generator. If given equal priorities, the one used will be randomized. You can also give one higher priority to favor it. You can find more examples for structure generation in the Examples section of the wiki.