Basic Structure Example
Required:
Items & Blocks
Building A Structure In Depth
Optional:
Expressions & Generation Logic
Terrain Blending
WorldEdit. Including brushes (masking, spheres, and smoothing) and basic editing (area selection, replacing, and filling).
This is a step by step guide with images on how to build a basic structure that properly blends into the terrain. Reading the optional pages is recommended to understand the concepts used in this guide, but not technically required. This guide shows the how, while the prereq pages explain the why. This guide requires that you have WorldEdit and WorldEditCUI installed.
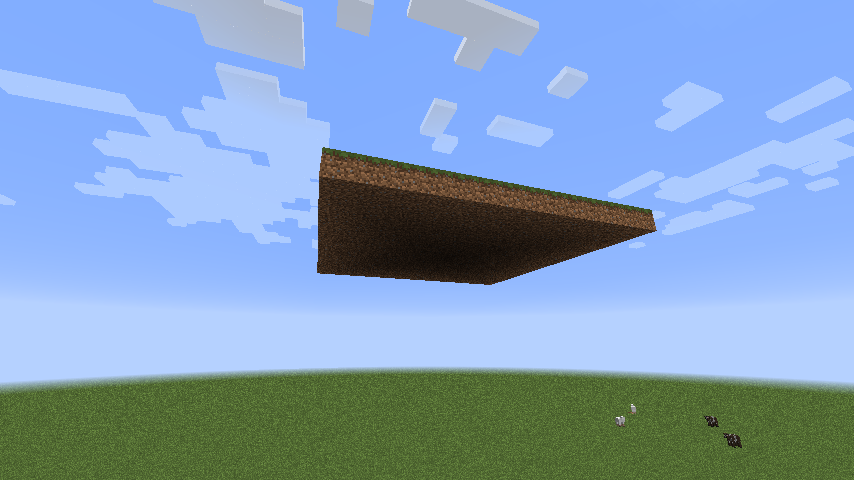
Your first step is to go into your build world and create a floating platform to build on. The height depends on how large your structure is, I typically just put it around Y80-100. Building in the air allows easily editing the underside of your structures. Use //pos1 and //pos2 to set two markers with WorldEdit at opposite corners to form a square (targets where you're currently standing), then use //set blockName of the ground block that you're structure is likely to generate on. Size doesn't matter, you can always add to it later:
 \
\
Then build your structure. This just makes it easier to place blocks. Should you need to expand your platform, repeat the above process along the sides or even overwrite the previous one with a larger platform (if your structure doesn't extend below the platform. Don't accidentally overwrite it). Should you make an edit mistake, you can use //undo to revert your last command (works effectively up to three times). Once you're done, select the corners of your structure using the wooden axe (WorldEdit converts this into an edit tool when installed):
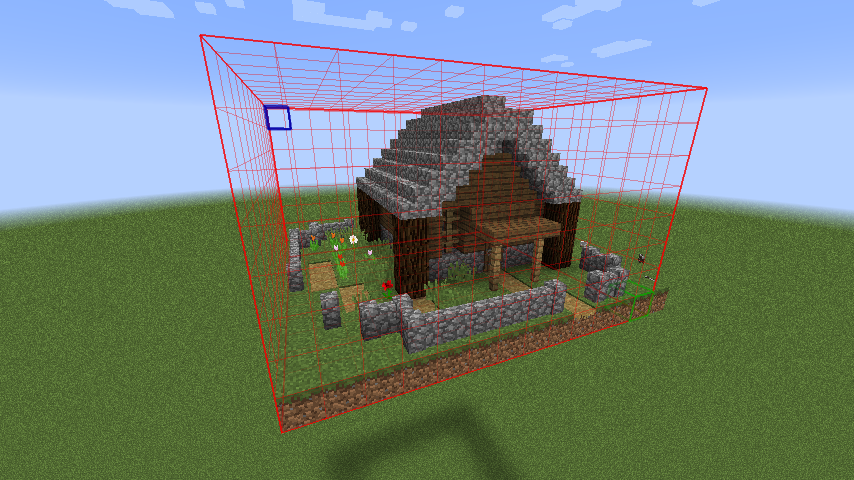
You want to select only until the corners of your structure. Break a block to select the first point, and then right click or use //pos2 to select the second point at an opposite corner. Then stand somewhere inside your structure and use //copy. Use a good reference point such as a corner or side, as when you paste it, it will be copied from that point.
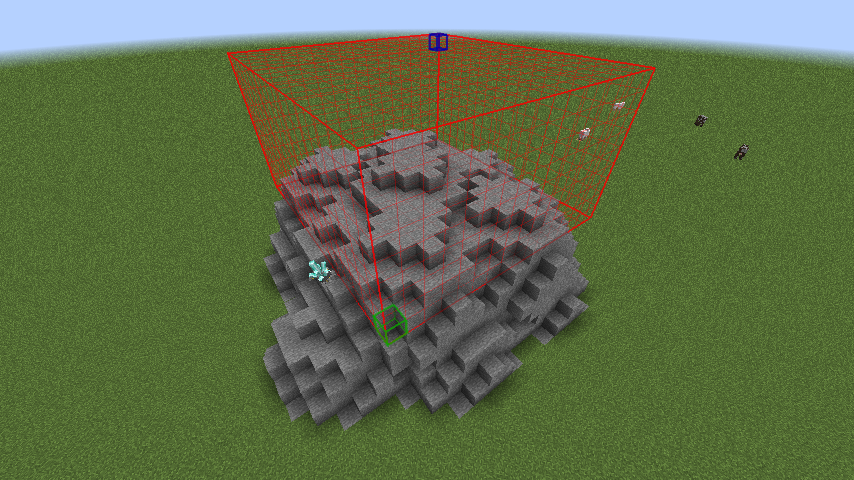
Now get out a tool (can be any item, I like using named tools to keep track of them as you can't bind multiple WE functions to the same tool) and run the following command to bind the WorldEdit brush to it: /brush sphere minecraft:stone 4. You can adjust the last number to change the sphere size depending on how big your structure is. Very large spheres will need smaller spheres to fill in the gaps. Now, start creating a grid of spheres on the ground roughly 20-30% wider in diameter than your structure:
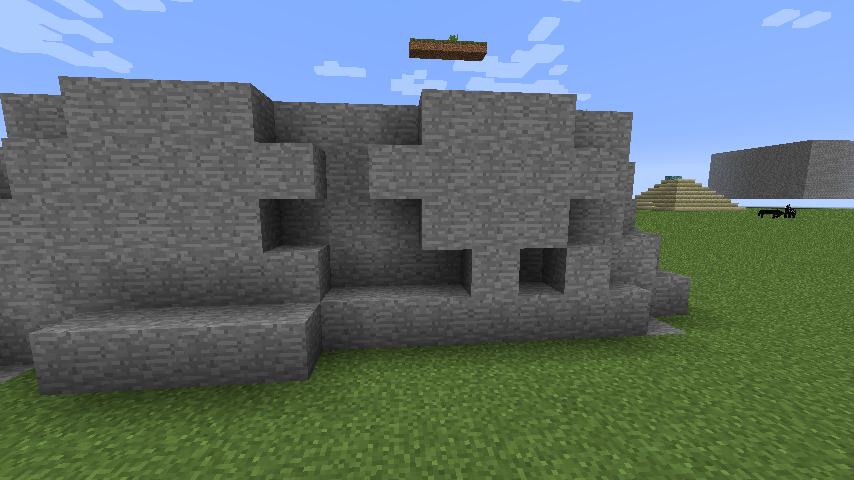
Then select the top 2-3 layers with WorldEdit and use //set air to flatten it. This blob will act as your structure's base. You'll likely need to fill in any weird holes. The goal is to make a semi smooth mound (don't smooth it too much as an irregular shape is more natural):
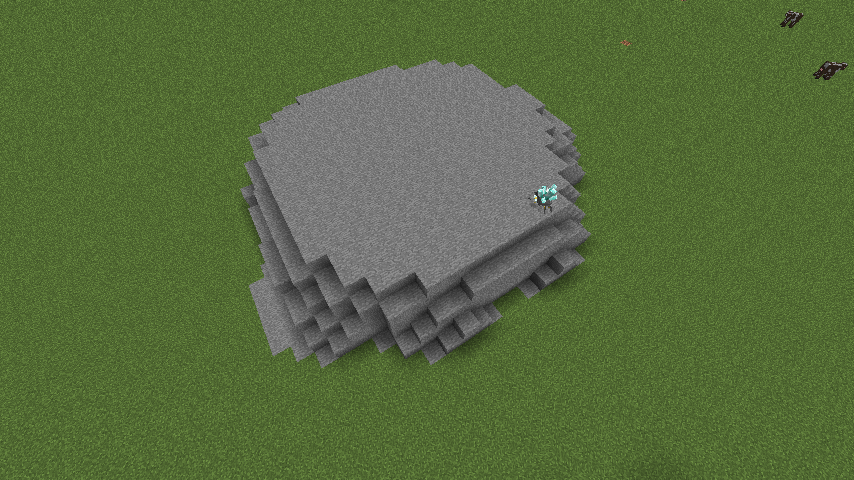
Once you're done, use WorldEdit to select the top 2-4 layers depending on structure/ blob size, and run the command //replace minecraft:stone reccomplex:generic_solid to cover the top with Natural Floor.
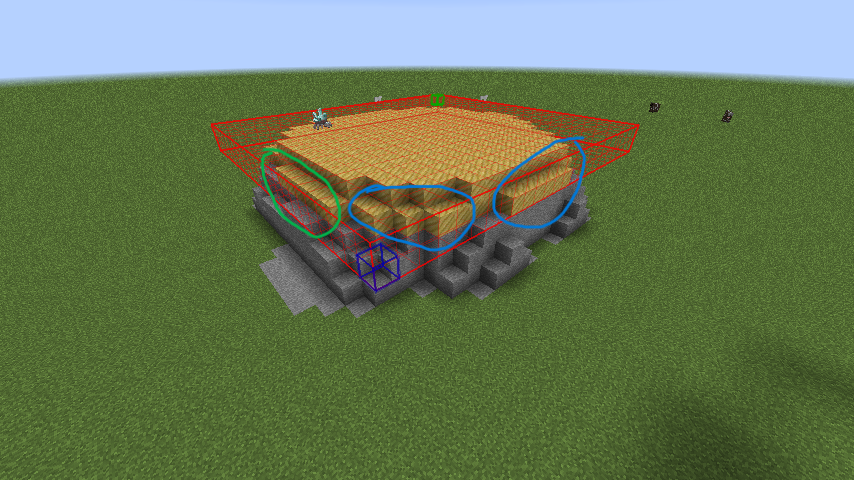
Note how the portions circled in blue extend to the edge of a straight face. This is something you'll want to avoid as the Natural Floor can create weird hair pockets like this. You'll want to taper it back like in the green circles.
Now choose a position on your base depending on your relative position when you copied the top half, and use //paste to paste it in. You want the ground of your structure to line up with the ground of your base. Use //undo if you need to make adjustments. For very large structures, it's better to create the blob first and just build directly on top of it, as pasting large structures is heavy on performance. Next, break up the border of the ground in your structure to blend it with the Natural Floor:
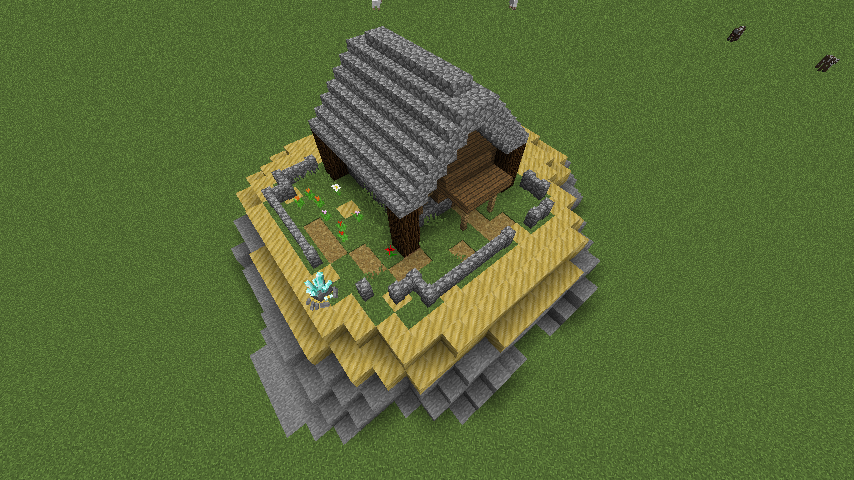
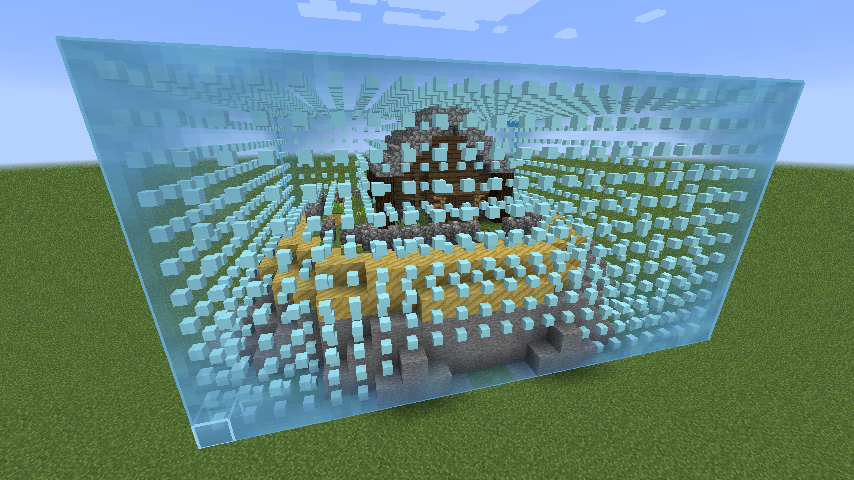
Now select your structure's bounds with the Floating Block Selector and run /#natural space to fill it in with negative space:
 \
\
Now grab a tool and equip an air brush with /brush sphere air 3 and then apply a mask with /mask reccomplex:generic_space. This will cause your brush to only affect the Negative Space blocks and not your build. Depending on your structure size, you'll want to make the sphere smaller or larger. Now while flying above it, start clearing out the space directly around any parts of your building. Then make a circular tapering away from your structure in a bowl shape, leaving the corners higher:
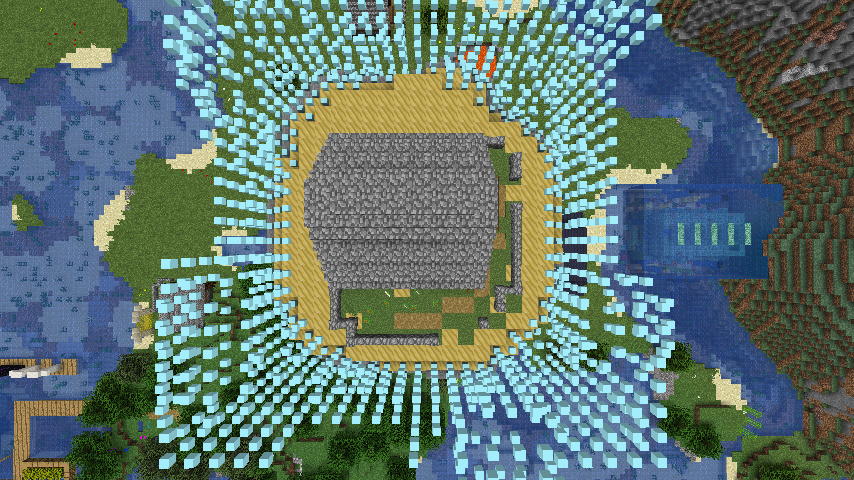
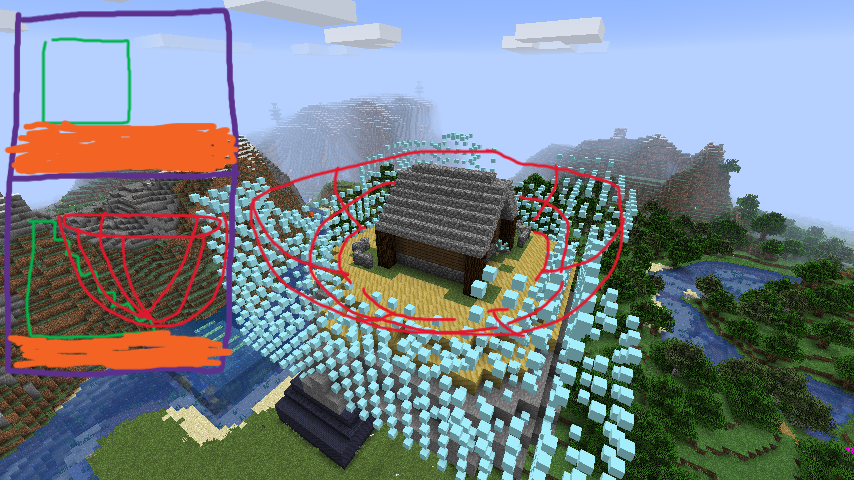
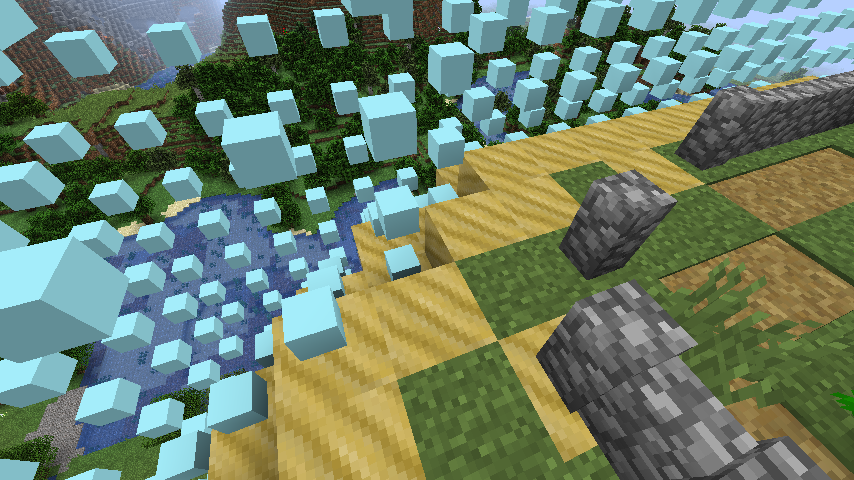
The goal is to make a bowl shape that will more naturally cut out surrounding terrain. You'll probably want to equip a sphere brush made of negative space blocks to fix up any weird shapes after (remember to use /mask air to avoid destroying anything). When you're done with your bowl, use WorldEdit pos# commands to select the floor section of your structure and run one last //replace minecraft:air reccomplex:generic_space command to make sure there are no air pockets along the base. You want negative space to completely fill any air on the outside below ground level:
 \
\
Now that your structure is finished, select its bounds and use /#export to bring up the configuration GUI. This brings up the root window:
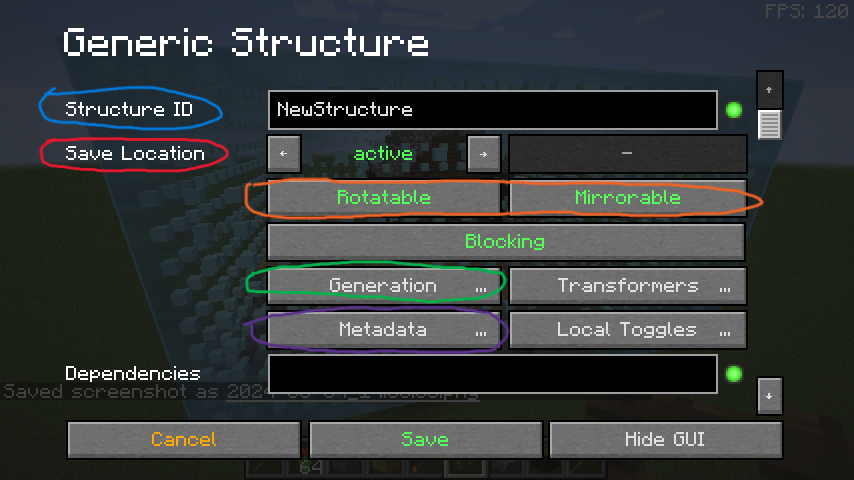
Set your structure ID/ name, outlined in blue. This is case sensitive and can't have spaces. Set whether it's rotatable and mirror-able depending on if you're using modded blocks which support this, outlined in orange. To find out, simply test generating the structure with /#gen name afterwards, and then use /#edit name if needed. Unless unsupported, you'll always want these on. Set your metadata if you plan on sharing the structure, outlined in purple. Also useful for keeping notes about structures in modpacks with large quantities of custom ones. Lastly you'll enter the generation window, outlined in green. Here you use the "+" buttons to select a generator type.
Then for random naturally generated structures, we'll select the Natural type:
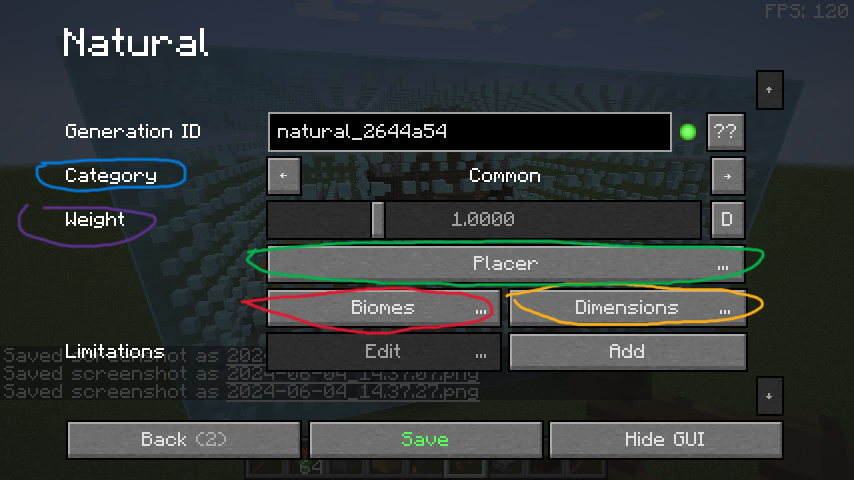
First set your generation category, outlined in blue. This determines roughly how frequently it appears. Next you can set the weight, outlined in purple. This determines how frequently it appears relative to others in this category. Then you can set the biome rules if you want (red). For this guide, we're going to set some strict rules:
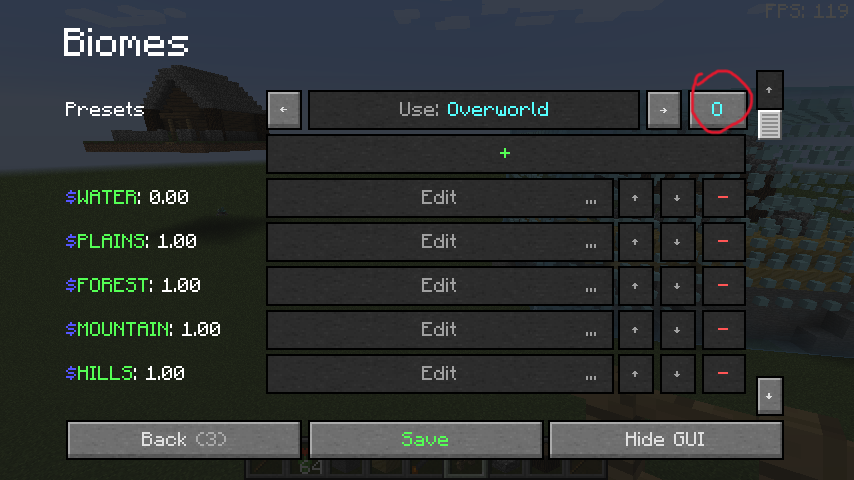
Select the blue "O" to customize the preset, then select "NONE" to clear the list. Select the O again and this time use the "+" to add an entry. In this entry we can enter expressions into the box and then change the weight slider if we have multiple biome entries to change how frequently a particular entry is chosen (e.g two entries where one prevents generating in forests, and a second allows it but has a weight of 0.5, would allow generating in forests 50% of the time). I'm going to use id=minecraft:plains to allow generation in plains only. Or I could use id=plains | (type=FOREST & !id=forest), which evaluates as "allow in minecraft plains, or in forest type biomes except if it's minecraft's forest" (note the namespace isn't actually required if it's from minecraft if you want to shorten things to be cleaner, as that's the default namespace).
Next is the dimension rules (yellow), which I'm going to set to id=0 to only allow generation in the Overworld. The window is identical to the biome one. Lastly, the placer, outlined in green:
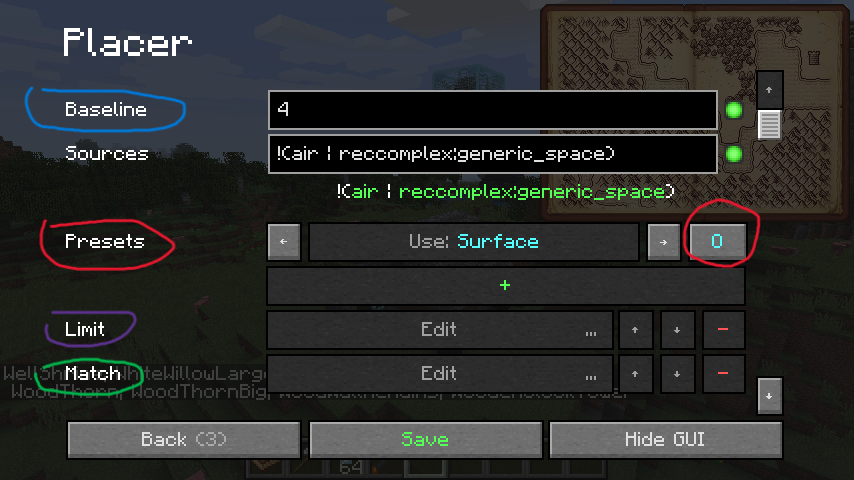
Here you'll set the baseline depending on how deep your structure base is. Mine is 5 blocks deep, so I set it to 4 (remember 0 is already set to bury your structure 1 block deep). Since this is a basic surface structure, I won't actually edit anything else in this guide. But should you wish to, use the "O" to cycle presets or edit a selected one. For a full list of placer features, see its section here.