

 DownloadModular Golems
Get the files on 9Minecraft
Crafting the 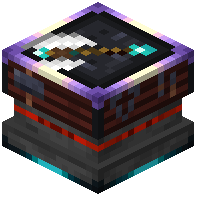 Golem Workbench
Start by placing down a Golem Workbench. This is the central block for assembling golems, applying upgrades, and equipping weapons and armor. Right-click it to open the assembly interface.
Assembling the Golem
Inside the workbench you'll assign a head, torso, arms, and legs to form a golem body. Different parts determine the golem's base stats and appearance. Once the body is assembled, you need to give it a core — the item that determines whether it becomes a Humanoid, Metal, or Dog Golem. Place the core into the designated slot and confirm the build.
The golem spawns as a friendly entity bound to you. It will follow you and attack hostile mobs by default. If it doesn't move, check that it isn't stuck in a block or waiting on a command.
First Things to Do After Spawning
- Right-click the golem with a
 Command Wand to open its command menu (follow, stay, patrol, etc.).
- Give it a weapon by placing a Golem Sword, Axe, or Spear into its hand slot via the workbench or by right-clicking it.
- Add at least one
 Empty Upgrade slot so you can install functional upgrades later.
Keep the golem near your base at first — it's weak until you install upgrades and armor.