Resource Pack Trails
Here are some explanations on how to use this mod's resource pack support. If you have any questions, feel free to reach out to me (dbrighthd on every platform) and I will do my best to answer!
Put textures into assets/elytratrails/textures/trails in your resource pack, then players can select it by typing in the name of the png into their "Pride/Trail Texture" settings.
You can also use these textures in your own trail overrides, explained below.
Below is how you define custom entity trails using EMF:
To create custom trail spawning points / wingtips in an EMF model, create a bone that contains the word "wingtip" or "trailspawner" in its name. You can't have two bones of the same name with blockbench/json in general, so that is why this leniency exists. (so you can name the bone "leftwingtip2" or something. Also its not case sensitive)
Some player settings change things about trails depending on if they come from the left or right wing, so to preserver that behaviour it is recommended to also include the words "left" on left wingtips and "right" on right wingtips.
Here is an example from my Elytras+ resource pack:
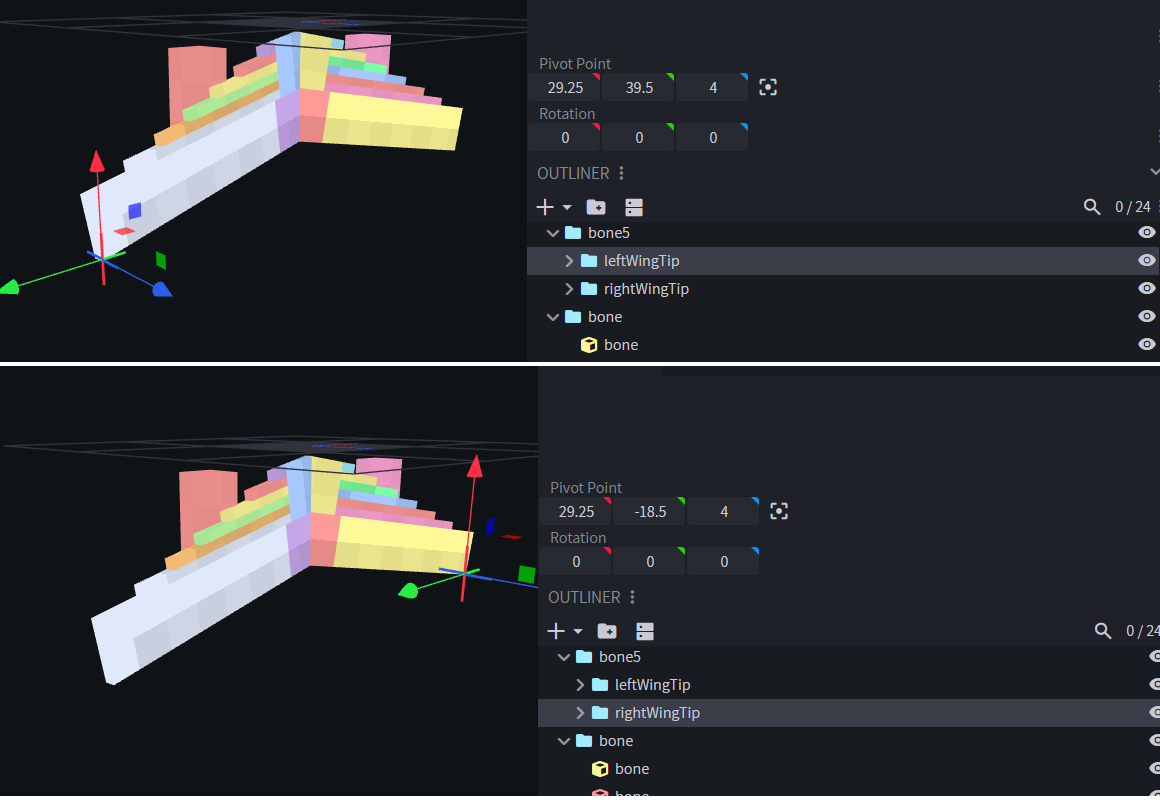
To toggle whether an emitter actually emits trails, set it's "visible" variable to false with EMF animations.
And this is the in-game result:
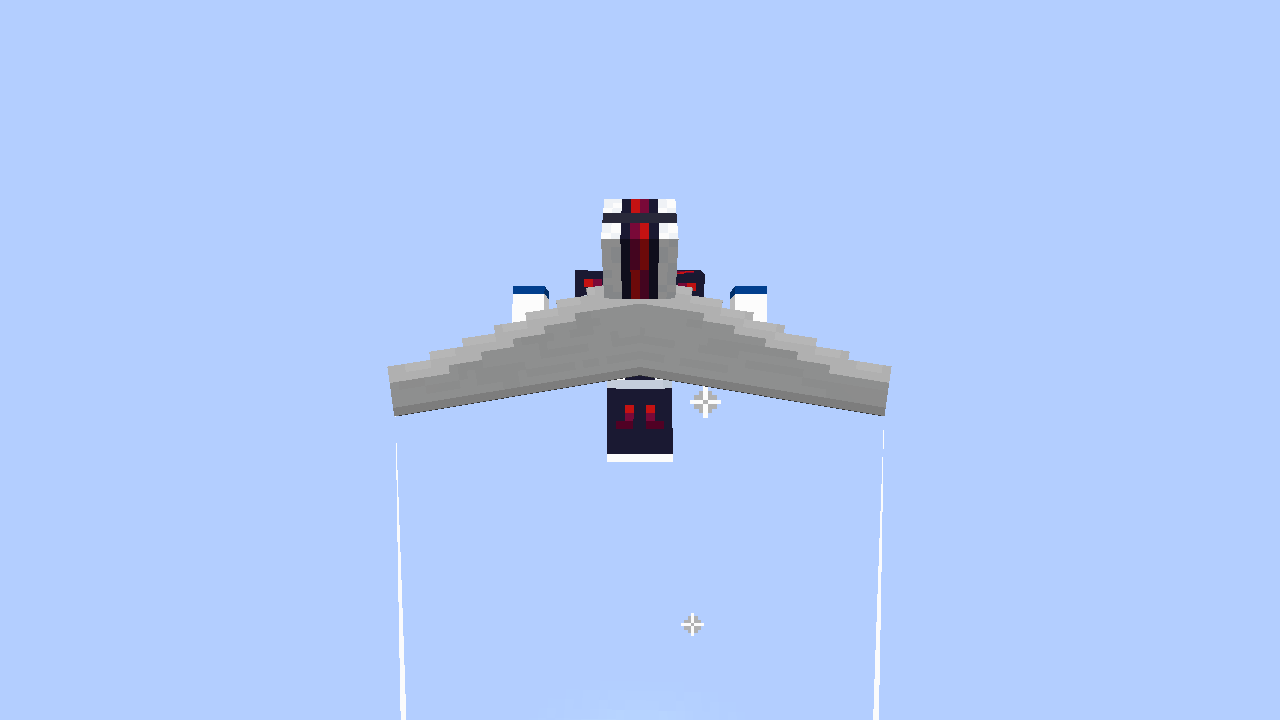
If your custom elytra model has any custom wingtips, it will use those instead of the assumed vanilla ones.
This should work on any entity model, except the player model.
To have your new custom wingtips use their own trail settings, create a json in your resource pack's assets\elytratrails\trail_configs folder.
Make sure to name this json the name of your JEM model, INCLUDING THE NUMBER (So if your model is elytra2.jem, make sure you are naming the json elytra2.json. if your model is axolotl.jem, make sure the json is `axolotl.json)
These jsons follow this format:
{
  "defaults": {
    <default settings for the model>
  },
  "bones": {
    "<BONE NAME>": {
      <emitter/bone-specific settings>
    }
  }
}
the settings in "Defaults" will be what the trail emitters in your model will default to if the bone doesn't have defined settings in the "bones" category.
Note that you are not required to put anything in the "defaults" section of the json, and if nothing is there then it will fallback to the player's settings (whether it be "Your Trails" for the client's player or "Other's Trails" if it is someone else or any other entity).
These settings follow the exact format as the Trail Presets, where you are not required to list every possible option, just the ones you want to set.
Here is an example of a config json
{
  "defaults": {
    "prideTrail" : "hide", //This texture can be ANY texture in assets/elytratrails/textures/trails
    "maxWidth": 1.0
  },
  "bones": {
    "LeftWingTip": {
      "prideTrail" : "rainbow",
      "enableRandomWidth": true
    }
  }
}
And here is what it looks like in game:
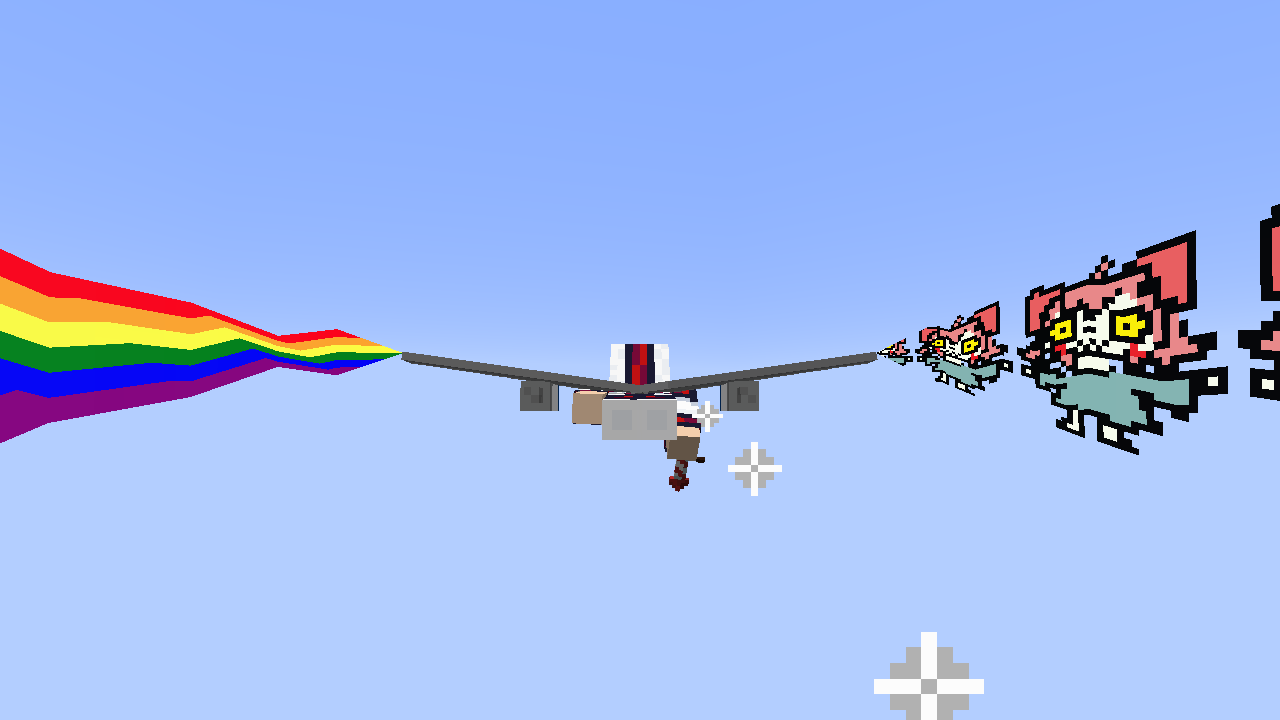
Notice that the "maxWidth" is applied to both sides, because leftWingTip doesn't have it defined for itself, while the rightWingTip is using the defaults.
And on the flipside, "leftWingTip" has enableRandomWidth, but rightWingTip and doesn't have it defined for itself, so it doesnt have random width.
If you want to re-use trails or certain settings within trails, you can define presets for the trails to use. These will apply everything from that preset FIRST, and then you can add specifics if you wish to override anything from the preset. heres an example:
{
  "defaults": {
    "parentPreset" : "hide"
  },
  "bones": {
    "leftWingTip": {
      "parentPreset" : "rainbow",
      "prideTrail" : "" //despite there being a prideTrail defined in the "rainbow" preset, this takes priority!
    }
  }
}
If you want to create your own presets specifically for your pack creation, but do not want users to have access to these presets in their config for whatever reason, put the preset jsons in assets\elytratrails\internal_presets. Then to use them, put internal: before the name of the preset, like the following:
{
  "defaults": {
    "parentPreset" : "internal:my_preset"
  }
}
That way you can have a bunch of presets without clogging the preset menu if you aren't intending for users to use them.
There are certain limitations when it comes to what you can influence per-trail. Mainly, you can only define speedDependentTrail and trailMinSpeed ONCE PER ENTITY, and it will apply to all trails of that entity. This is because the mod FIRST checks if it should even try to sample a trail from the entity before it knows anything about the entity's model or bones. This is an unfortunate limitation and I hope to circumvent it in the future, but until then please make sure that either you only have speedDependentTrail defined in the main entity model, or just one. These need to be specified in the json, not in the parent preset!
On a similar note, for any non-elytra entity that has custom trails, speedDependentTrail is assumed to be false unless specified.(originally it fell back to whatever was defined in "Other's Trails", but that didnt feel right for general entities. although everything else does fall back to "Other's Trails" if not specified)
If you want to define custom elytra trails without requiring an EMF model, my mod will "assume" that the vanilla elytra's bones are named "leftWingTip" and "rightWingTip", so you can still define it in elytra.json in your assets\elytratrails\trail_configs folder, and even without EMF or any elytra models, it will work.
If you want to define custom ENTITY trails without EMF, this gets a bit more limited, you can define ONE trail per entity without EMF. The settings for this trail must be in the "defaults" section of the JSON.
The trail will spawn at the "center" of the entity (what ever the game considers the center, depends on the entity but for most models it is the feet), but you can offset this by definined xOffset, yOffset, and zOffset. These are in model units*, so the same that blockbench uses.
*For entities like thrown ender pearls or snowballs that do not have entity models, these will use block position sizes for their offsets
Here is an example of how the built-in arrow resource pack defines it in arrow.json, to make the trail come from the back of the arrow
{
  "defaults": {
    "parentPreset": "internal:arrow",
    "speedDependentTrail": true,
    "trailMinSpeed" : 0.05,
    "xOffset": 8.0,
    "yOffset": 0.0,
    "zOffset": 0.0
  }
}
and here is what the built in allay.json looks like, to make the trail come from the center of the allay's body:
{
  "defaults": {
    "parentPreset": "internal:allay",
    "xOffset": 0.0,
    "yOffset": 4.0,
    "zOffset": 0.0
  }
}