Replay Mod — Guide
Recording Mechanics
Recording is the core function of the mod. By default, the mod is set to automatically record all Singleplayer and Multiplayer sessions.
Recording Indicators
When a recording is active, a "Recording" indicator appears in the top-left corner of the screen. This can be toggled in the settings. Upon joining a world or server, a chat message will confirm that the recording has started.
Event Markers
While recording, you can press the M key to set an Event Marker. These markers act as bookmarks, allowing you to easily find specific moments (like a boss fight or a build completion) when you later open the Replay Viewer. Markers save your current coordinates and the exact timestamp.
Saving Replays
Replays are saved as .mcpr files. When you leave a world or server, the mod will finalize the file. Larger sessions may take a few seconds to save. These files are stored in the /replay_recordings folder within your Minecraft directory.
Replay Viewer and Navigation
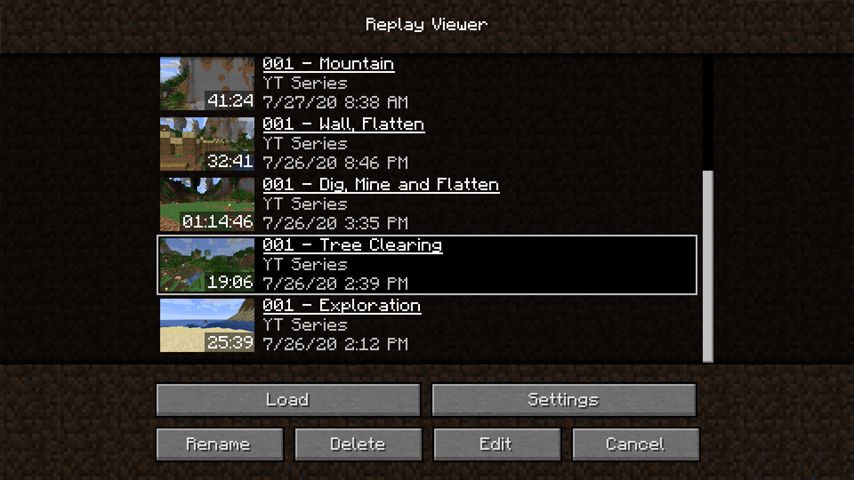
Access the Replay Viewer from the Minecraft Main Menu. This interface allows you to manage your recordings, including renaming, deleting, or loading them.
Movement Controls
Once a replay is loaded, you enter a spectator-like state with the following controls:
| Control | Action |
|---|---|
| WASD | Move horizontally |
| Space / Shift | Move up / down |
| Mouse Wheel | Adjust flying speed (Scroll up to accelerate) |
| J / L | Tilt camera clockwise / counter-clockwise |
| K | Reset camera tilt (roll) |
| T | Unlock mouse cursor to interact with UI |
Time Manipulation
- Play/Pause (P): Freezes all entities, particles, and block updates while allowing the camera to move freely.
- Speed Slider: Adjusts playback speed from 0.1x to 8x the normal game speed.
- Replay Timeline: Click anywhere on the top timeline to jump to that point in time. Note that jumping backward or across large gaps may require a short loading period.
- Quick Mode (Q): Stores an internal reference of entity and block properties for near-instant timeline navigation, though it may disable some visual effects like second skin layers during the preview.
Camera Path System (Keyframes)
The Keyframe System allows you to design smooth, cinematic camera movements. These paths are defined on the Keyframe Timeline (the bottom timeline).
Position Keyframes
These store the camera's spatial data (X, Y, Z, Yaw, Pitch, Roll). By placing multiple position keyframes at different points on the timeline, the camera will smoothly interpolate between them.
Time Keyframes
These control the flow of time within the camera path. A time keyframe maps a point on the Keyframe Timeline (real-world time) to a point on the Replay Timeline (in-game time). This allows for slow-motion or fast-forward effects within a single cinematic shot.
Interpolation Methods
- Cubic Interpolation: The default setting. Creates smooth, curved paths between points.
- Linear Interpolation: Moves the camera in straight lines between keyframes. Toggle this using the O key.
Spectator Keyframes
If you right-click an entity to spectate it, the "Add Position Keyframe" button changes to "Add Spectator Keyframe." This allows the camera path to perfectly follow a player or mob's perspective.
Path Preview
Press H to toggle the visual path preview. This displays a red line in the world showing exactly where the camera will travel.
Rendering and Video Export
Rendering transforms your camera path into a high-quality video file. Click the Render Camera Path icon (floppy disk) to open the settings.
Rendering Methods
- Default: Standard video rendering.
- Stereoscopic: Side-by-side 3D video.
- Cubic: 360-degree panoramic view using cubic projection.
- Equirectangular: 360-degree view compatible with YouTube's VR functions.
Encoding Presets
| Preset | Description |
|---|---|
| MP4 - Default | Balanced quality and file size (x264 codec). |
| MP4 - High Quality | Near-lossless quality for professional editing. |
| MKV - Lossless | Perfect quality, but very large file sizes. |
| PNG Sequence | Exports every frame as an individual image. |
| OpenEXR | High-dynamic-range format that can include depth map data. |
Advanced Render Settings
- Render Nametags: Toggle the visibility of player and mob names.
- Stabilize Camera: Prevents the camera from tilting during 360-degree renders, ensuring a better VR experience.
- Chroma Keying: Replaces the sky with a solid color (e.g., green or blue) for post-production compositing.
- Depth Map: Exports depth information, allowing for advanced 3D effects in software like Blender or After Effects.
Utility Features
Ambient Lighting
Press Z to toggle Ambient Lighting. This illuminates dark areas (caves, night scenes) without changing the sky color or requiring Night Vision potions. An eye icon in the bottom-right indicates when this is active.

Player Overview
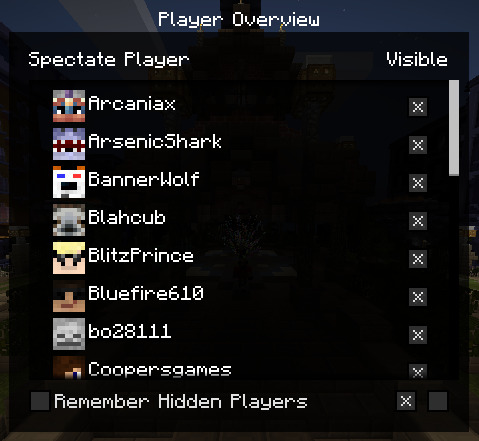
Press B to open the Player Overview menu. Here you can see a list of all players in the recording. You can toggle their visibility individually or hide all players to focus on the environment.
Keyframe Repository
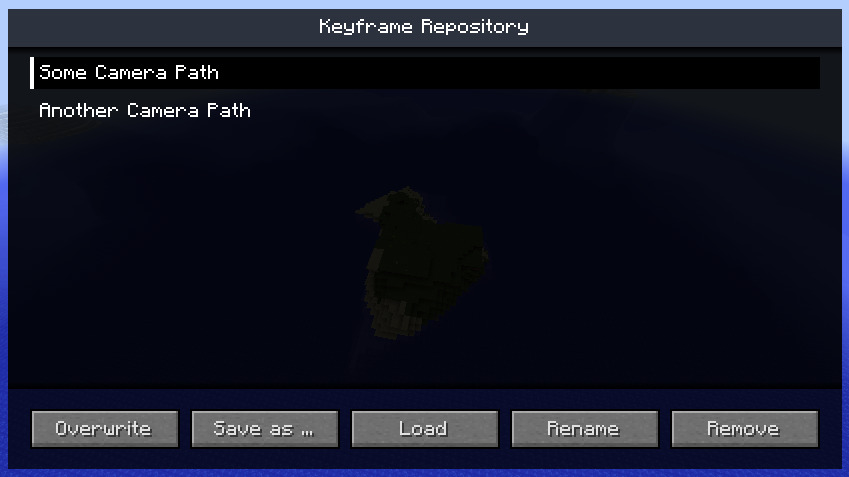
Press X to open the Repository. This allows you to save and load camera path presets. Every replay file has its own repository, making it easy to manage multiple different shots for the same recording.